In Preparation for my AirLocker installation in the coming weeks, I decided to get the compressor mounted. It took a little thinking to find the proper location for my application. I have dual batteries and a battery isolator. I did remove the AIR pump and associated valves and switches so this makes up some room. I also removed the carb cooling fan. This is were I decided to mount the compressor. The compressor is suppose to be mounted as high as possible and away from direct heat. Luckily I still had the duct for the fan so I used it as a template. I cut out a plate from 16ga and drilled holes for both the mounting points.
I then mounted the compressor to the plate using the supplied hardware (including the backing plate)?
The compressor and plate were then installed into the inner fender. It just clears the clutch master cylinder and the pressure switch and air chuck clear the wheel well. The filter for the compressor is mounted toward the firewall to insure clean dry air.
When I originally installed the TBI setup on my ’87 FJ60 I used a vehicle speed sensor (VSS) from Jags that Run. While this was a good sensor and lasted many years, it never tightened snugly to the transfer case driven gear housing. This would cause a shaky speedometer needle when cold. Even after trying to shim it with a washer it wouldn’t tighten down. On a short trip to Capital Forest I had a stick get caught on the speedometer cable and brake the sensor off (forgot I didn’t have the skid plate on).
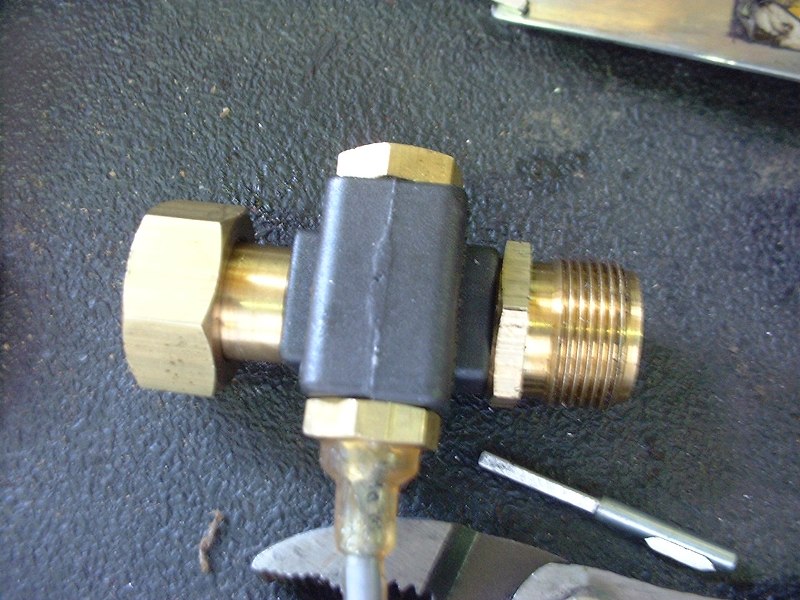
After searching around for an alternative I found Aurthur Allen, a manufacturer in Chicago. They make a very nice sensor with a cast hosing and solid brass fittings.
While it is available in metric threads to fit the Toyota cable/transfer-case, it didn’t have the correct tang on the transfer-case side or the correct slot on the cable side. I still had the drive tang from the old VSS.
The old VSS had an extension housing built with the appropriate driven tang (or drive tang to the cable I guess).
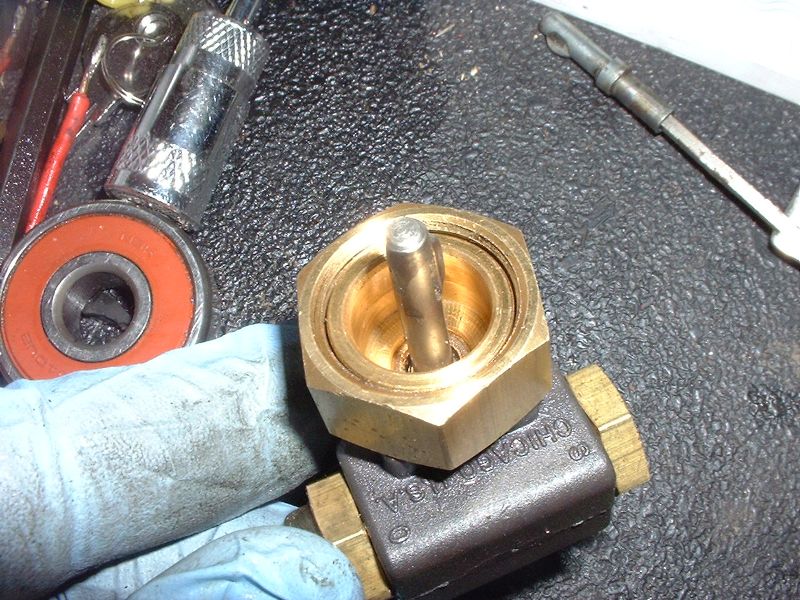
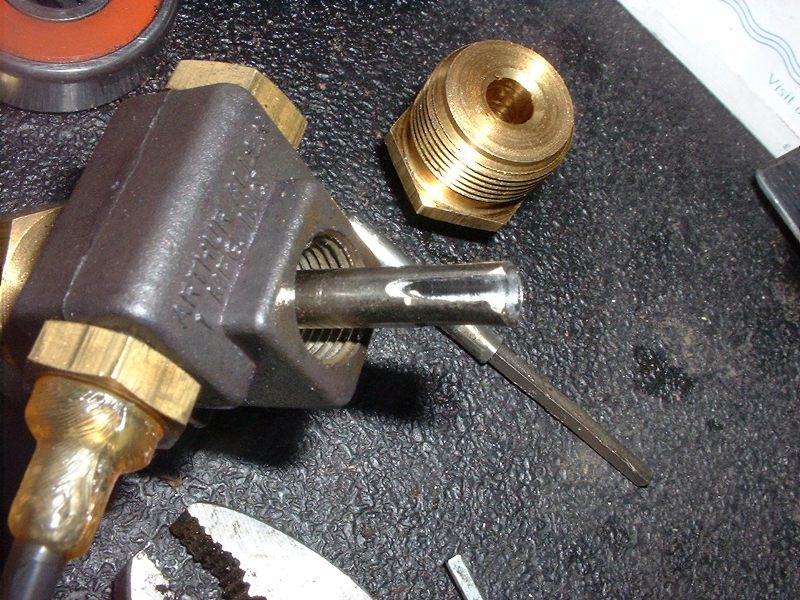
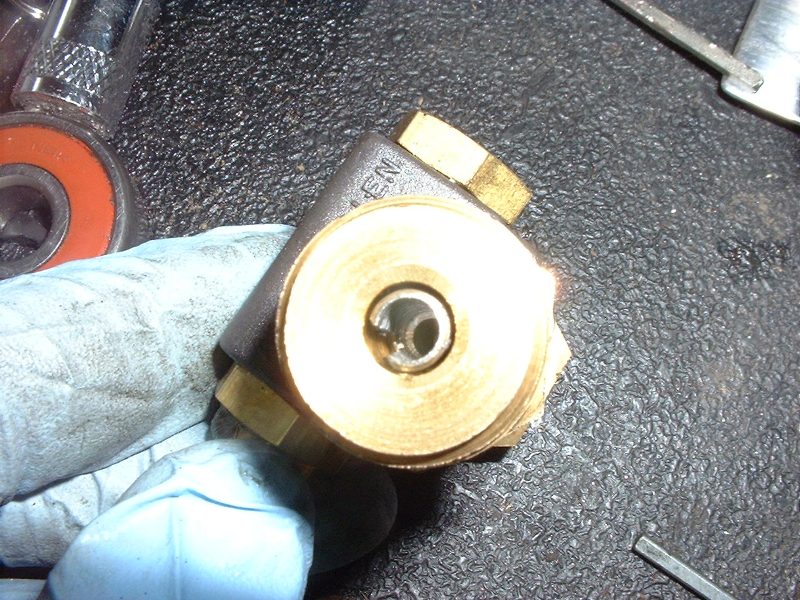
Any way, it was easy to disassemble the sensor and remove the shaft. I then drilled out the TC side to just over .187″ (using a 3/16″ drill bit) and using my cut off wheel made a slot for the cable.
I then drilled out the brass fitting to 5/16″ to make room for the protrusion on the tang and re-assembled.
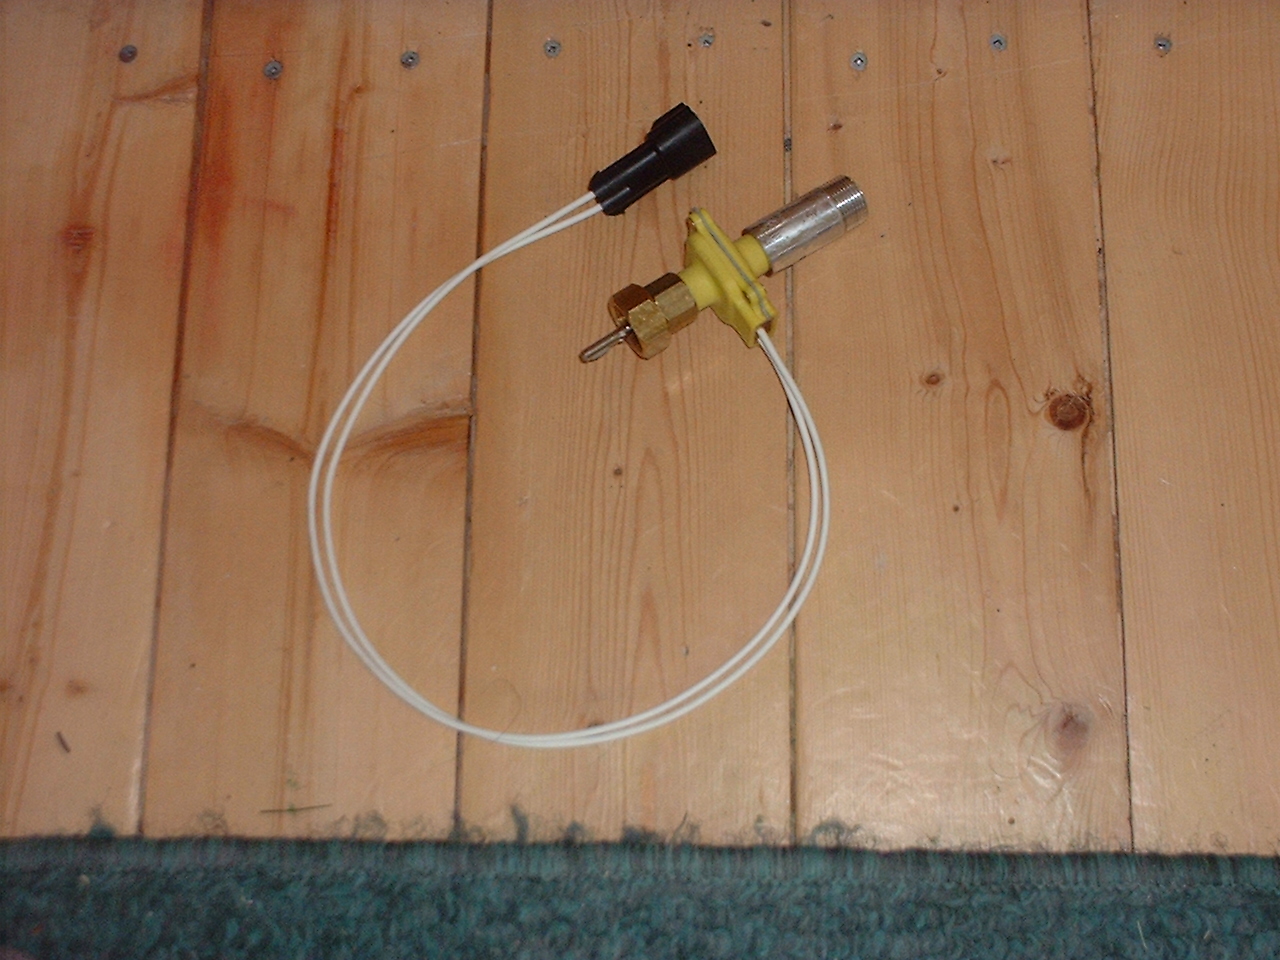
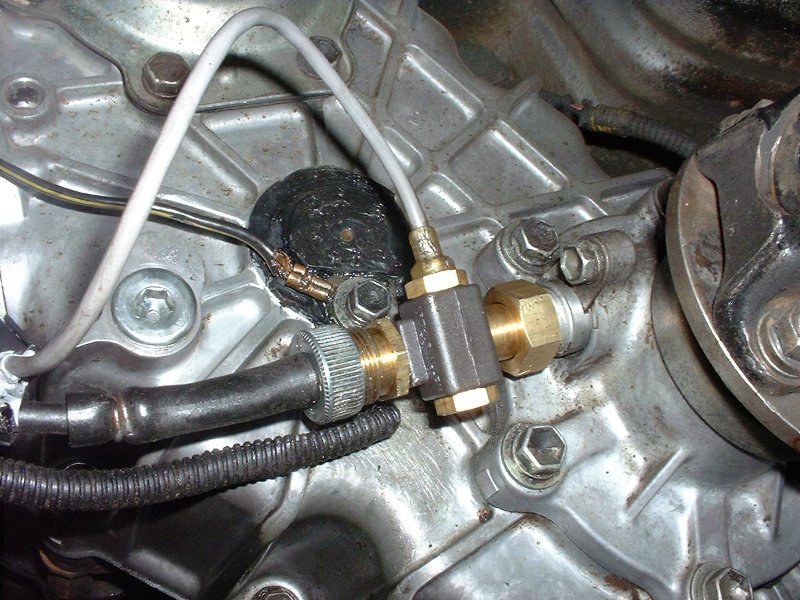
Finally I mounted the sensor and finished the wiring. For the wiring I used a two pin weather pack connector.
A few notes on this VSS. It tightens town nice a snug with no movement. It is shorter than the other VSS because it doesn’t have the extension added. I suppose only time will tell if it is a better design or not. I ordered this one from Portland Speedometer for $100 to my door. A little more the the JTR, but hopefully worth it.
I recently had a friend ask my about buying a FJ60. He and his wife recently had their second child. This topic comes up often on the IH8MUD.com forum . So I thought I would write down my 2 cents.
Having a child is exactly the excuse (or reason) I used to get started in Land Cruisers and get my 60.
A few things about 60s, as I have observed them.
Diesels were not available in the US, but Canada got them until 1987 (BJ60) with the 4 cylinder 3B engine and (HJ60) 6 cylinder 2H engine. They are at the age that they can now be imported into the United States, but I have no experience there. Non-North American engines are also available from few sources, G&S Cruiser Parts in British Columbia being one I am familiar with.
The US trucks also did not come with 5 speeds, but after 4/86 (I think), they came with a 4 speed that was the same length as the 5 speed so the swap is easy. The Canadian diesel trucks did have 5 speeds. The 5 speeds behind the B series engines use a different input shaft than the 5 speed for the H and F series engines. Don’t buy a 5speed out of a BJ to put in your F/2F. Earlier 4 speeds require modifications of transmission mount, drive shafts and tansfercase shift linkage. New 5 Speed (H55F) transmissions are available from Toyota for around $1895 (less if you hunt around).
Common body rust areas are around the rear fenders and the A pillars by the top of the windshield. If the A pillar seams have been leaking, look for rust in the floor pan too under the carpet. If you ever want some help looking at one let me know.
One note for future use with the kids. The rear seats didn’t have a shoulder belt. No big deal for child seats that just use the lap belt, but later on with the booster seats it can be an issue. I installed rear belts from an ’89 FJ62. Some of the earlier 60s have the threaded nut in the C pillar for the top of the shoulder belt, but the later (’87 in my case) did not. I was able to get a nut up there and it is very secure, so don’t let it be a deterrent if you find a nice later truck.
All 60s are carburetor. In ’88 they went to the FJ62, which had the 3FE port injection engine in front of an Auto tranny. Some of the first ones didn’t have power windows, but all of the later ones and the ’89/90 62s do.
I keep forgetting to take pictures of bad ones, but can get a picture from a clean one I just finished. It is common for the inner axle seal to leak on the front axle of a high mileage rig. It is also common to leak on one that has been rebuilt wrong. The inner axle seal leak allows gear oil to move from the front differential into the birfield joint area inside the knuckle. This mixes with the grease and becomes a soupy mess. Soon, the grease/oil mixture will start leaking out the wiper seals. Dust and dirt collect on the knuckle making a thick mess. Worst case, the gear oil will migrate out to the wheel bearings, leaking out the outer axle seals and soak the disc and brake pads.
I love driving the 60 and I think it makes a great family rig and I have used it as my daily driver for 6 years now. I should be turning 300,000 some time this winter, and have had it since 180,000.
I’ll keep adding to this as I think of things or they are pointed out to me.
This isn’t a trail run perse, but was a really great opportunity to learn some new things and put all skills needed for safe overland driving to the test. The format for the class was a one day, 3 hours in the “classroom” and another 8 hours putting it all to use. The class was taught by Chris Wood, ARBs Western Region Sales Representative and Assistant General Manager. Chris is a certified trainer with the International 4WD Trainers Association and brings over 23 years of experience to ARB’s program.
Chris welcomes drivers of all experience levels and promises to sharpen the skills of both the novice and seasoned off-road-er. This class is put on FREE of charge to participants. There is no hard sales pitch for ARB products, but you get to see alot of them in action. I attended with members of our local TLCA chapter, the South Sound Cruisers and some other area FJ Cruisers owners.
Picture by OlyWAFJ
Before heading out from Whistln’ Jack Lodge on Hwy 10, every vehicle under went a safety inspection. Items checked were the basics like steering components, brakes, safety gear, first aid kit, fire extinguisher, lights, tires and leaks.
Our first assignment, on the way to the classroom, was to back 1/3 of a mile up a logging road. I know, it doesn’t sound like much, but if you have never backed up more than out of a parking space it can be quite a challenge. 1/3 mile is a long way in low range reverse, then through in some corners and steep down hill and you have an interesting challenge.
Our Second task before arriving at the classroom was to practice our backing technique again, but up a step slope onto the trail, around a tree with a steep soft edged slope on the other side. We then continued to back down the ridge trail to the classroom parking area.
Picture by OlyWAFJ
The term classroom is used rather loosely here. We were in a small clearing beneath several tall Ponderosa Pines and a few smaller firs. It was a nice level shady place were Chris went over the basics of four wheel driving and being prepared for overland travel. It was a rather detailed session, but here are a few important high lights.
Are you fit for the trip? It can be a long day on the trail. It can be a lot of work to extract a stuck vehicle. It can be a long hike out should your vehicle become disabled.
Vehicle inspections.
Vehicle familiarity.
Recovery points, under-body protection and tires.
Travel plan, does any one know were to start looking if you don’t come home?
Packing for the trip. You always plan on the trip being longer than a day. Do you have enough food, water and shelter if you have to stay the night? What about a comprehensive first aid kit.
Safety and Survival.
Basics of the 4wd vehicle.
Vehicle recovery – evaluate the situation
Straps
Winches
Jacks (do you know the right way to use your HiLift?)
Driving – what to look out for and how to act around other users. The last part is very important to the survival of our sport. See the BlueRibbon Coalition web site for more info.
Picture by OlyWAFJ After the classroom, we set out on the Clover Springs trail, #696. This is a beautiful drive along the northern edge of the William O Douglas wilderness. During recent thunder storms, a series of small fires were started in the wilderness. Through out the day we could see the smoke rising on not so distant hills. Being a wilderness area though, they have a let it burn policy that really helps improve the health of the forest.
After several steep climbs and drops we reached our first major task. We had to recover from a simulated “failed hill climb”. In this exercise we had to stop half way up a steep hill with rather loose footing. We then had to back down the hill around a tree and a turn in the trail. Now we could see the importance of the days first task. Every one completed without any problems and we moved on.
Picture by OlyWAFJ
Our next exercise was a recovery drill. If you had a winch, you had to self recover (while anchored to the vehicle infront of you). If you didn’t have a winch, you had to do an assisted recover with a strap. It was easy to see how important it was to apply a constant amount of power from the stuck vehicle regardless of the recovery method used.
Picture by OlyWAFJ
Everyones favorite exercise was the spotting commands drill. Chris believes that the student REALLY pays attention if they have to spot their own vehicle, so that is what we did and it works. There was just one small (overlooked in previous discussion) condition of this exercise. The driver (of your vehicle) was going to have their eyes closed and be given you signal from a “co-driver” in your passenger seat navigating through a cone course, up hill over uneven terrain with you trying to tell them with hand signals which way to go to miss the obstacles and the cones. Like all the other exercises, it was ok to opt out if it was beyond your comfort level. It was a very strange sensation driving a very slow moving vehicle over uneven terrain with you eyes closed.
That was the end of the training. The rest of the day was a pleasant trail ride out to clover springs and the FS road down Whistl’n Jack Lodge.
Along the way home we had the opportunity to put some of the skills covered in the class to a real world test. The FJ Cruiser traveling infront of me was pitched sideways off the trail when the back of his truck slid off of a rock in loose soil. Chris setup the recovery using my winch and the winch from the truck in front. With a little bit of pulling from both ends, and driving backward then forward in 2wd, he was soon back on the trail.
Picture by Victor
picture by Victor
Our second real recovery was when Chris took a very loose steep hill. With just 20 feet to go, all wheels started spinning and he dug himself into a spot. Two of the FJ Cruisers went around the bypass (which was only a little better than the main hill) and with both of them for the anchor and some liberal winching, We were again soon back on the trail. Once I got to the top (using the bypass of course) I noticed a line running up the hill between Chris’s tire tracks. It had been hard to see in the loose silty hill, but the ruts were just deep enough for the differentials to be dragging. That certainly didn’t help in his hill climb attempt.
Last winter I finished up a little project I have been thinking about/working on for a little while. I had tried to install a factory PTO winch a while ago but decided not to when the drive shaft would no clear my MAF headers. I liked the look of the factory PTO winch bumper (but a little smaller). I decided I would try and fit the 8000# winch I had sitting around and didn’t want to spend the money on an ARB or the like.


 Picture by OlyWAFJ
 Before heading out from


