Categories
Outdoors Overland travel Tech

Off-road Tent Trailer Build, Part 2

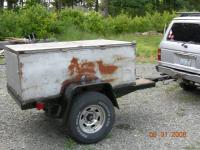
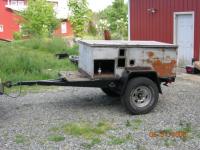
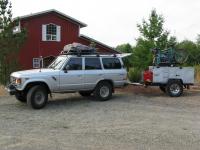
idaho-trip-by-david-031Now that the trailer has been completed and test I thought I would finish up the trailer build with some finished pictures, a recap of features and parts used as well as a summary of the trailers performance.

We recently completed a 1625 mile trip (about 100 miles on dirt/gravel roads) to Idaho.  The full write-up is HERE.
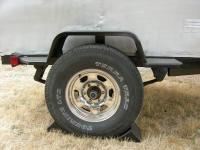
finished_trailer_13The only changes I need to do to the trailer is to change the axle from spring under to spring over.  Once fully loaded with water, camping gear, extra fuel and bikes (or tent in the future) I have very little travel left between the bump stops and in the fenders.  It will also allow for slightly larger tires.  Here it is with 31″ tires.  I would like to fit 34″ tires to match the Land Cruisers.
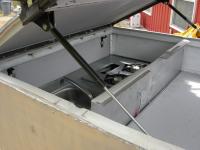
finished_trailer_12The next area of improvement would be lid strength and stronger struts.  With the bikes on top it was very difficult to lift.  The lid also flexes.  If there are not two people to lift it is almost impossible.

Features that need to be added still are fuel can holders.  I picked up a pair of J Cans from Expedition Exchange.
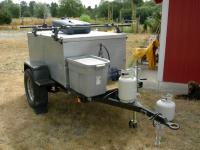
finished_trailer_11I also need to add some brackets to hold the propane tanks but I haven’t decided on the size of tank.  Right now I have one 11# tank it it was more than enough for a week of camping with cooking and hot water.  I don’t think there is a need for a 2o# tank.  The current plan is to mount the tank on the tongue using a bracket similar to the ones used on the Fleetwood tent trailers.

Pictures of the interior of the trailer. I used AGM batteries for safety and reliablility (like optima just no spiral).
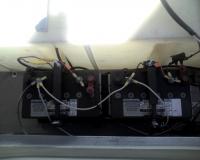
photo_091208_001
When at a campground our at home, I use a trolling motor charger to keep the batteries topped off. When driving I charge through the vehicle using a hellroaring battery isolator I installed as part of my Dual battery setup into an 87 FJ60 | OlympiaFJ60
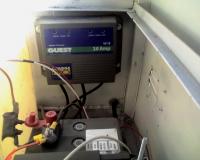
photo_091208_002

The back of my power box. I used circuit breakers from the batteries to the power. One battery is for the water pump and lights. The second batter is for the inverter.
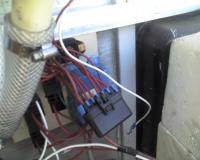
photo_091208_003

For the inverter I just used a 400 watt inverter I had wired with a relay to switch on and off from the switch panel.
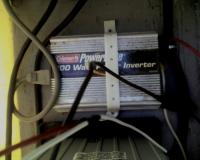
photo_091208_006

Here is a shot of the water heater. You can see how much space this thing takes up. I think in my next trailer I will use the on demand type heater instead. The second picture is off the whole inside. The water tank is the other item I would change. It is too tall. I think a wider but more flat one would work better for storage space. Even with the limited space I am able to carry the camp table, chairs, tent and shower/toilet enclosure.
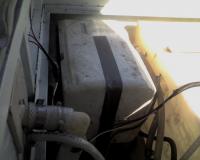
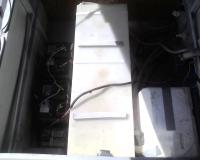
photo_091208_004

photo_091208_005


Categories
Overland travel Tech

Off-road Tent Trailer Build, Part 1

trailer_build_02

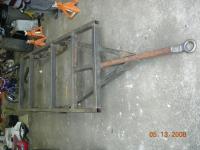
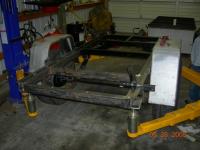
A few posts back I introduced my “old” camping trailer and stated I was going to start to rebuild it. Here is the first installment of the rebuild process. It took some time to figure out how exactly I wanted to approach this. The old camp box was built on my M416A1 military trailer. While this would work again, I find I have use frequently for this little trailer as is. I decided a new, dedicated trailer was needed. The next step was to figure out whether it would be better to find a built trailer and make the box fit or build a new trailer to fit the box. I decided on the latter. After a few trips to Centralia Supply and Fabrication I had enough parts together to start the build. I decided on a simple ladder frame build from 2″x3″ tube steel. I chose to use a combination A frame draw bar that extends to the spring mounts. I had some old Land Cruiser springs and hangers so I used them.

For the axle I went to ABC Trailer Parts as recommended on the forum Ih8mud.com. Since it is going to be a little heavy fully loaded and for off-road use I opted for a 3500# axle with electric brakes. I think this will greatly improve the safety and drive ability of the trailer on the Highway and off-road.

trailer_build_11

I had the old fenders so I went ahead and used them. They are a little small for 31-33″ tires but I think they will work out fine.

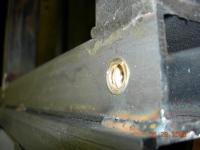
The trailer is decked with 1/2″ pressure treated plywood fastened down using rive nuts and flathead cap screws. I decided to add the deck in increase the usability of the trailer. While I said I wanted a dedicated trailer for the camp box, I realize having an extra trailer could come in handy.

trailer_build_10

I just used some LED boat trailer lights from Schuck’s Auto Supply. Be sure to print out the page and take it in if you decided to get these lights. Online they are $39.99 and in the store they are $54.99. Schuck’s will price match it’s online prices if you have proof of the price.

trailer_build_21

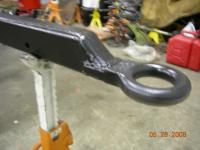
For the draw bar I had a piece of 2″x3″x1/4″ tube. I welded a pintle lunette onto the end and formed it for a little cleaner look. I drilled a 1/2″ hole for the safety chains about 12″ from the end and added the brake away switch for the trailer brakes. This hitch is rated at 10k# and should be more than sufficiant for my needs. If you are a concerned about the strength of your particular draw bar, take a look at this source (found on ih8mud.com) for specifications gleaned from some Australian Highway Codes.

trailer_build_28
trailer_build_23

The box is held to the trailer using the same rive nuts, 4 per side. Now I just need to add some “D” rings to the sides of the box so I can easily hoist it off.

The box will house a RV style hot water heater, power connections, 2 deep cycle RV batteries and a 20 gallon water tank. It also has provisions for a sink and stove that slide out of the back of the trailer. There is also room in front of the box to store extra fuel, water, cooler or other supplies.

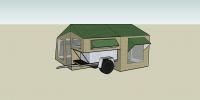
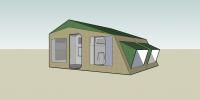
Eventually I would like to add a large tent to the trailer making in a complete off-road camper. I am currently trying to source a supplier for such a tent.

trailer_tent
trailer_tent_2

Here is a sample 3D model I drew up using Google’s Sketchup program.

I will continue to add more as I complete the build process.  Next up will be batteries and a charging/inverter system.

Categories
Overland travel

Scouting Whiskey Dick

All pictures posted here are courtesy of Steve Bisig at PNW Backroad Adventures. Special thanks to Jerry at Backroads Drivers Northwest for leading this outing. For a detail trip report, visit Steve’s writeup.

It was the hottest day yet this spring and we were headed from Yakima to Kittitas, WA to meet up with the caravan of vehicles heading to the “trail head”. It was suppose to reach 90 deg so I stopped and filled up with cold drinks as well as fuel before heading off the black top. Just as we approached the Old Vantage Highway, I saw a long line of 4wheel drives heading east. We fell quickly in line as the 10th vehicle. Jerry, our intrepid leader turned off onto the Corral Whiskey Dick Road. This is the southern entry point into the Whiskey Dick Road Managment Area, managed by the Washington Department of Fish and Wildlife.

This area is mostly accessible by 4wheel drive. High clearance is not required but good tires and a supple suspension will make for a nicer day. On this trip there were three Jeep Wranglers, two Ford Explorers, two Toyota Land Cruisers, one Ford offroad conversion camper Van, a newer Chevy Pickup and one older Jeep wagon.

Heading up the hill you can see the Wild Horse Wind facility operated by PSE. We remained to the east of this facility but could see it as we rose to each of the ridges. It was turning out to be a hot and dusty day. Many of our fellow overlanders were along to photograph the flowing plants of the scrub steps, including the hedgehog cactus. We continued along the road over many hills and into valley after valley, many having natural springs and signs of early settlers attempts at home steading and ranching.

After making it north to the Quilomene Ridge Road, we headed west for our last leg of the trip. Unfortunately Jerry started having a problem with his ’76 Jeep Wagon. It was acting as though he was out of gas on the uphill sections, despite showing half full (later proving true with only 20 gallons going into the 40 gallon tank). He had to keep it in low range and the peddle down to have enough power to make it up the hill. Flats and down hills were not a problem however. At our highest point we ran into patches of snow lingering from the winter. We had to cross a series of these to get the rest of the way out. There did not appear to be any other tracks in the snow here. Then we were onto the Colockum road down to the Kittitas valley and into Ellensburg.

Here is a 12 minute “clip” of our trip. Thanks to every one how came along and made this a fun first “back country” drive for my son.

Scouting Whiskey Dick, the movie

Additional resource

PNWadventures Forum

PNW Backroad Adventures Blog

Turner Photographics

NW Source hike of the week

Categories
Overland travel Trail Runs

Driving Northwest Forest Logging Roads

When driving the back roads of Washington you are likely to encounter all sorts of roads and vehicles. I would like to address “logging roads” through the forests of the Northwest.

Having worked in the woods for a number of years, I have become accustomed to driving logging roads and “dealing with” other logging road users. Weekends are a little easier but during the week logging roads can be down right dangerous to the unaware driver. There can be a wide range of vehicle traffic such as foresters in pickups to fuel and lube trucks servicing the heavy equipment at logging sites to loaded log and dump trucks. While drivers can seem rude at times, remember this is THEIR place of work. Their livelyhood relies on traveling these roads.

A few basic rules to follow while driving these roads are common sense. First of all SLOW DOWN and turn your headlights on. It may seem like you are the only one out there at times but 35 mph on a gravel corner can be really fast when that loaded logger lumbers into view, and according to the “law of gross tonnage” you will not be the winner. Many of the roads are not posted with speed limits, unless it is part of the county road system. 10-15 mph is a good speed for most locations with a narrow 1 or 1 1/2 lane road. Wider roads with long lines of sight and well maintained can be safe at 35 mph. Remember there are spur roads (short dead end roads) all along the way and they are often difficult to see from a distance. Headlights make it a lot easier to been seen as you pass from clearing to timber. If the oncoming car is in the sun and you are in the shadows you will be very difficult to see.

Second is to read road and warning signs. This can be misleading, at times as old signs are often neglegted and no longer a valid warning. Look for other “signs” too. If the sign says “Keep Out, active opperations” but the road has a layer of leaves and looks as though no one has driven it in a while you can assume operations are no longer active. If the road is well traveled and there are other indicators of a logging operation (strips of fresh bark, new rock, etc along the side of the road) then do as the sign says. If you are up berry picking and you encounter a sign that says the roads have recently been sprayed, look for a different berry patch. Chemicals used on roadsides are not hazardous to us in the doses you will find, but who like fresh fruit covered in weed killers. Lastly, plan on staying out of the woods during HIGH fire danger.

Active logging roads are often open to travel, even during the day when trucks are traveling it. Look for a sign that has the CB channel (you have a CB don’t you?) for the road and make not of the road name or number. Number three is, if you are going to travel logging roads, get a CB radio. They are inexpensive and are available at Radio Shack as well as other online and local electronic stores. Tune to the proper channel and listen for traffic. If a channel is not marked start at ch14 for main haul roads, ch12 is often used on secondary haul roads as well as ch13. Call out your position as you start up the road (I will use C-line as a generic road name) “in bound c line at the black top”. Look for numbers along the way either painted on threes, stumps or rocks as well as little signs tagged to trees. These are road markers used to identify the position of various vehicles along the road. If on your way in you pass a 2 painted on a tree call out “”inbound c-line marker 2”. Also listen to were the other vehicles are. “Loaded logger number 4 outbound (or east/west/north/south depending on road)” means you should start looking for a good turn off before you meet up with the truck.

Last, keep to the right. Theres the basics.

I found some good info on CB radios over at Roadtrip America.

If you have other advice or experiences with logging roads, please contact me or comment. I would also like to start a list of common CB channels used on main logging roads in the Northwest.

Categories
Overland travel Trail Runs

Searching for Snow, Part II

Again we visited the Ahtanum area West of Yakima.  This time there was a little more snow.  We traveled the North Fork Road up past Snow Cabin.  We were able to make it within 2 miles of Darland Mountain from the north on this road before the snow (and snowmobile tracks) halted progress.

Snow Cabin CGWe spent the first part of the day at Snow Cabin Campground (there was no cabin that I could see).  This is a nice campground at about 4700′ elevation.  It has about 6 camp sites with fire pits and picnic tables.  There are 2 unisex latrines as well, but no running water.  We setup for at one spot for lunch.  I had forgotten to bring firewood, so we scavenged a few of the other fire pits for semi dry/charred wood to use.  After an hour of trying to start a fire (while I was making lunch on the camp stove) we gave up.  We ate lunch, then decided to head further up the road for deeper snow.

Sleed hillOnce we were denied access to the top of Darland Mountain, we headed back down the road a little for a good sledding spot.  We ended up finding one at an intersection with the 2300 road and spent an our sledding and having a snowball fight.  There was about 18″ of snow here.  We were just under 5700′.  I could only trek to the top so many times before I was worn out. 

snowball fightIt was getting later in the day and I didn’t want to be too far up a snow covered road once it got dark, so we headed down and around to Treephones.  We started a nice fire in the wood stove again to warm up the cabin.  We then had a good hide and seek snowball fight in the woods around the cabin.  We stayed until dark, having a snack in the now toasty cabin before heading down. 

It was another nice visit to the East Slope of the Central Cascades, one we will repeat several times throughout the winter.